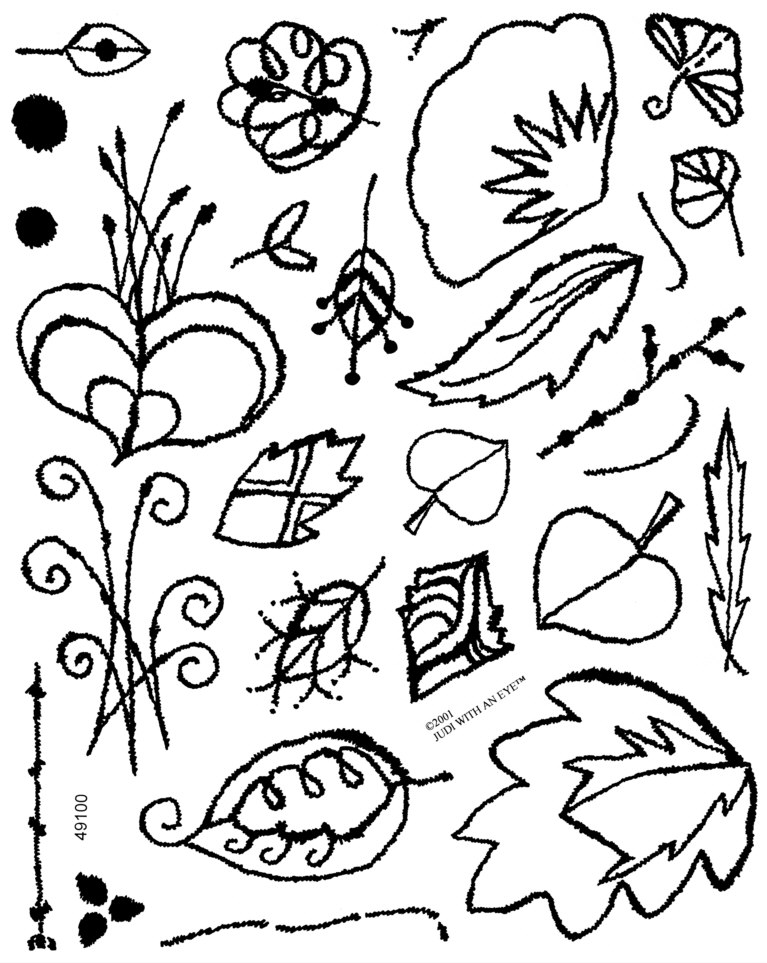
Combining Petals --
-
Several stamps are shaped like individual petals or leaves. They can be used
alone or combined in groups of two, three, four, five and more.
-
Use either the rounded portion or the pointed end at the center as desired.
-
Flower centers can be made with the X-shaped motif, small dots, double bud,
or hand drawn.
|

|
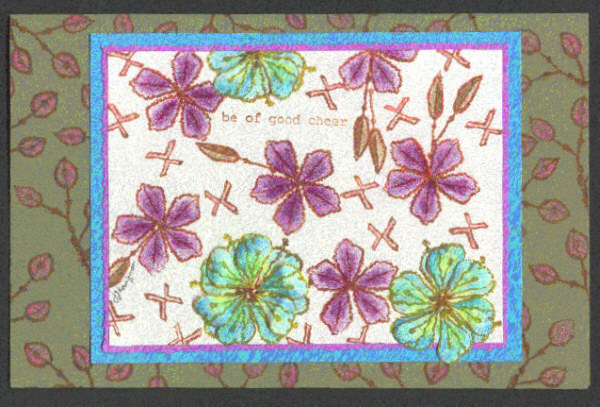
Be of good cheer --
-
Use small petals to create assorted flowers. Stamp leaves, phrases and small
motifs between flowers.
-
Stamp folded card with a branch of leaves for an allover background.
-
Color with pencils or markers. Stamp, color and cut out extra petals to make
some of the flowers dimensional (roll petals over a fingernail or pencil to
make the curve.
-
Layer center area of card on two complementary colors. Center on folded card.
|

|
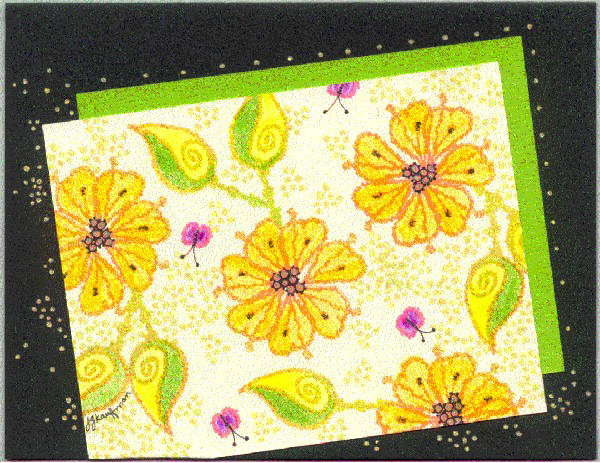
Flowers and butterflies --
-
Stamp flowers, leaves and motifs in light colors.
-
Color with pencils. Add bold details with black and gold gel pens.
-
Layer stamped card on plain lime green card stock, then adhere both at an
angle on a folded black card. Add clusters and rows of gold dots with gel
pen.
|

|
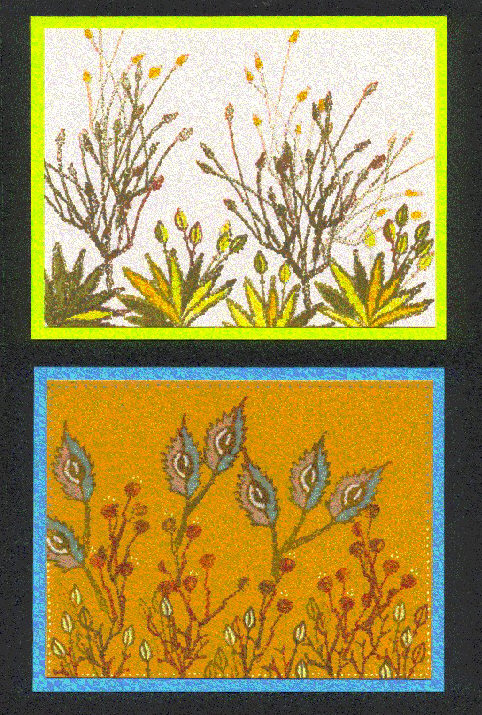
Big garden --
-
Use orange section of rainbow pad to make large flowers. Stamp aloe-shape
(half-circle or fan shape of leaves) several times in different directions
like a starburst for full flower, in same direction for side view flower.
Stamp "pompom on a stick" stamp for flower centers.
-
Use olive section of rainbow pad to make aloe border at bottom (same stamp as
used for flowers in step 1).
-
Stamp assorted leaves, branches and small motifs to create an overgrown
garden around the flowers. Use light lime portion of rainbow stamp for the
areas that will appear as background, darker bolder colors for accents that
will appear in the front.
-
Color with pencils.
-
Add fine gel pen details as shown or as desired. The gel pen details on the
stems help the large flowers stay prominent, the fine "running stitch" style
line around the top and sides makes a nice border.
|

|
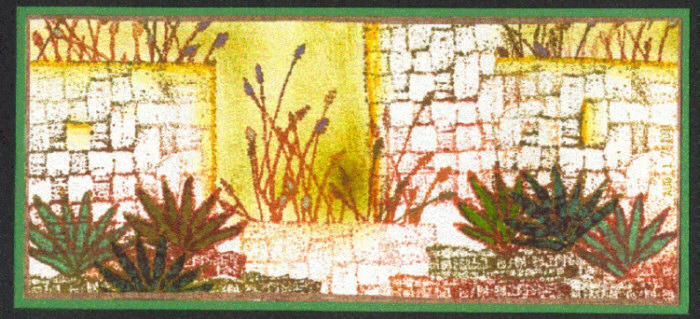
Garden wall --
-
Stamp sections of woven look stamps from Tactile Impressions to make a wall.
-
Stamp plants on top of the wall areas.
-
Color with markers. Note that there was no masking used for the bottom of
the card, but the top and center areas were masked so the plants appear to be
growing out of the wall at different heights.
|

|
Fantasy garden postcards --
-
Play with stamps, gel pens and markers to create imaginary landscapes.
-
Layer onto complementary card stock for sturdy postcards (or onto folded
cards if preferred)
|

|
Long garden postcards --
-
Play with stamps, colored pencils, gel pens and markers to create long narrow
postcards.
-
Cut narrower card stock for bookmarks; small rectangles, circles or triangles
for gift tags.
-
Use scissors or craft knife to make a wavy shape at the sides as shown card
with turquoise background. Outline with marker and draw small gold circles
with gel pen.
|

|
-
Add Rango Zoo bug or other critters for a little bit of whimsy.
-
Use black gel pen for extra details and patterns.
|
 picture added soon
|
Lacegarden 9A
-
The large heart with center details looks good on its own or over a heart
pattern background.
-
Sometimes a garden can be very simple.
Lacegarden9B
-
Limit yourself to one ink (shown - Adirondack Eggplant) and combine stamps to
create a bold card.
-
Note how the small leaves fit inside the fan shape and how the heart is
turned upside down below the fan to form a tassel. The border around the
phrase is made with a long, narrow curved stem stamp.
-
This style card would look great embossed, tone on tone, or in black on a
mottled or rainbow background.
|
 picture added soon
|


 picture added soon
 picture added soon